
Signs Shower Silicone Needs Replacing: When to Act Before Leaks Occur
An experienced trade breakdown of the key warning signs of failing shower silicone caulking, why DIY capping fails, and how to prevent costly hidden water damage.
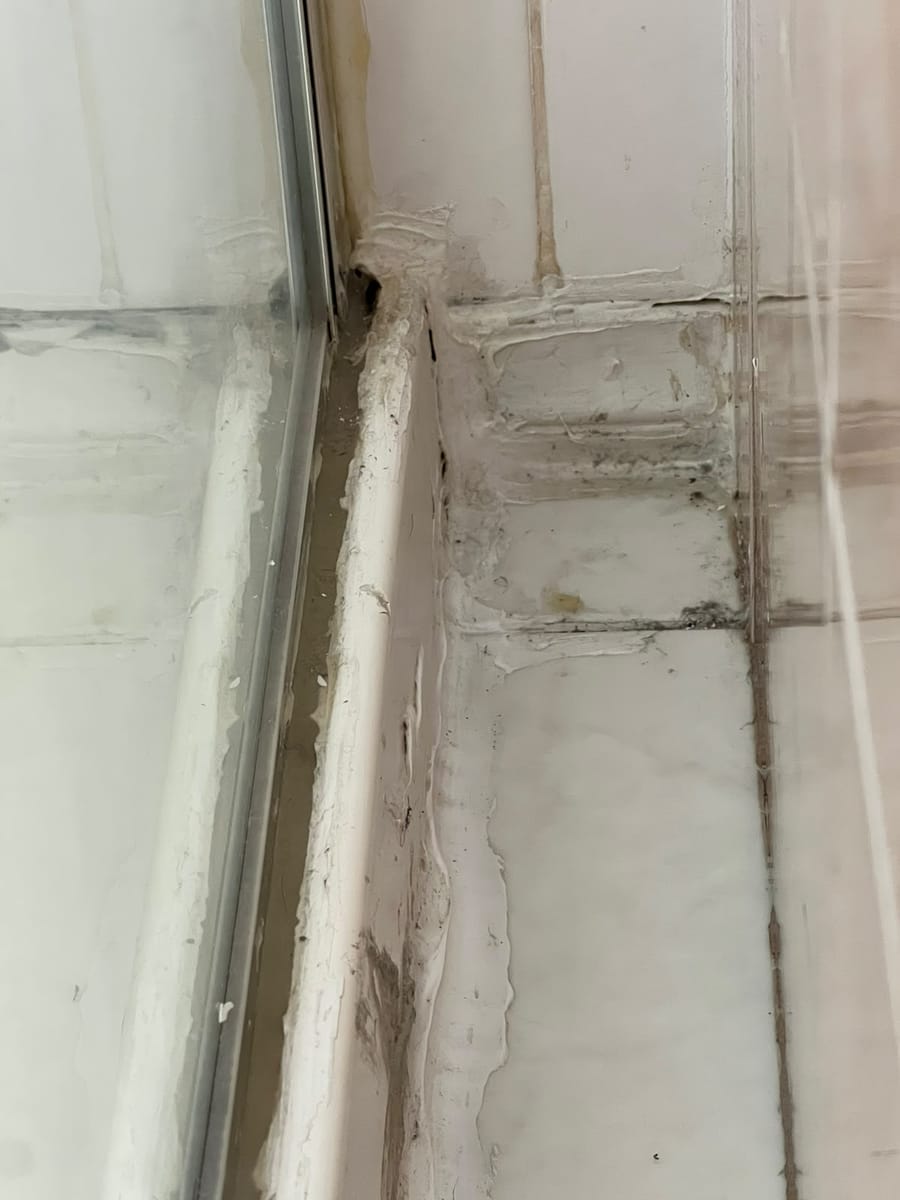
The Finite Lifespan of Bathroom Caulking in Daily Showers
Many homeowners assume that silicone sealant installed during bathroom construction will last the lifetime of the home. In reality, commercial trade consensus recognises that sanitary silicone in daily domestic showers has an average operational lifespan of 3 to 7 years.
Silicone is an elastomeric synthetic polymer designed to bridge movement joints. Day after day, it is exposed to extreme conditions: thermal shocks from 40°C hot water followed by cold drafts, acidic body soaps, alkaline shampoos, abrasive scrubbing sponges, and constant bathroom humidity. Eventually, even the highest-grade silicone undergoes chemical breakdown and mechanical fatigue.
Recognising the early symptoms of silicone failure allows homeowners to reseal the shower before water escapes behind the tiles and rots structural timber framing.
Sign 1: Black Mould Embedded Behind the Bead
The most obvious visual symptom is black mould spotting along the silicone bead. When mould sits purely on the surface of glazed tiles, domestic bleach or vinegar will wipe it away. However, when black speckles appear inside translucent silicone or beneath white beads, the mould is no longer superficial.
As silicone ages, microscopic micro-tears develop along its bonded edge. Capillary action draws water and organic grime behind the bead, where mould spores germinate against the bare tile face. Scrubbing with bleach only bleaches the visible surface; the roots remain protected inside the joint and return within days. Once mould is embedded behind the bead, complete removal and replacement is the only hygienic remedy.
Sign 2: Peeling, Curling, and Edge Debonding
Inspect the fine edge where the silicone bead meets the tile or acrylic shower base. If the feather edge is beginning to curl up, lift, or peel away like tape, the chemical bond has failed. This debonding creates a hidden channel where water flows directly behind the shower screen frame or bath hob every time the shower is turned on.
Sign 3: Split, Torn, or Shredded Joints Along the Floor
The floor-to-wall junction experiences the greatest movement stress in a shower. If you notice a visible tear running along the centre of the silicone bead, the material has exceeded its elastic elongation limit. A torn silicone bead provides zero water barrier.
Sign 4: The Soap Scum Biofilm Cycle
As silicone weathers, its smooth surface becomes microscopically pitted. This microscopic roughness traps bacterial biofilm—a slippery, translucent film of bacteria and body fats. Once biofilm forms, it creates an adhesive primer that accelerates fungal spore attachment. If your corner seals feel slimy within 48 hours of cleaning, the silicone surface has degraded and requires replacement.
Sign 5: Hidden Water Damage Outside the Bathroom
Often the first indicator of silicone failure is discovered outside the bathroom. When water bypasses split silicone along the shower threshold, it tracks along the timber floorplate. Homeowners frequently notice swollen MDF skirting boards, blistered paint on the hallway wall, or damp, musty carpet in the master bedroom walk-in robe.
The Failure of DIY "Capping" Over Old Silicone
A common mistake by property managers and DIY enthusiasts is "capping"—running a bead of fresh silicone directly over old, mouldy caulk. Silicone will not stick to silicone. The new layer forms a weak skin that traps moisture underneath, creating a foul odour and peeling off in ragged strips within weeks. The old bead must always be sliced out completely down to clean, bare tile.
The Capillary Suction Effect and Hidden Frame Decay
When silicone separates from a tile edge by even a fraction of a millimetre, physical capillary action draws shower runoff directly into the void. Because surface tension prevents water from evaporating out of narrow cracks, the space behind the split bead remains continuously wet.
In Melbourne timber-framed residences, this trapped moisture slowly saturates the bottom wall plates. Left unaddressed for 12 to 24 months, timber framing softens, fostering wet rot fungi and creating an ideal entry point for subterranean termites, which are prevalent throughout Victoria. Regular visual inspection of perimeter seals is one of the most cost-effective preventative maintenance habits a homeowner can practice.
Professional Concave Tooling vs Amateur Finger Smearing
Another tell-tale sign that silicone was improperly installed is a flat or convex bead with ragged smeared edges across the tile face. Amateur installations often rely on wiping silicone with a wet finger, leaving paper-thin feathered edges that trap grime and peel within months.
Professional trade tooling uses calibrated silicone profiling spatulas to form a crisp, concave bead with distinct, sharp cut-off lines. This ensures the full thickness of the silicone is concentrated over the joint, providing maximum elasticity while shedding water freely toward the floor waste.
Honest Trade Advice: Waterproofing Membranes vs. Regrouting
Regrouting and perimeter silicone replacement restore damaged, porous, or mouldy joints. However, regrouting addresses grout-level water ingress but cannot repair or restore a failed waterproofing membrane. Under Australian building standards (AS 3740), internal waterproofing membranes sit beneath the screed and tile bed. If that membrane or structural substrate has failed, regrouting alone cannot fix an underlying leak. We provide clear, honest assessments from photos and on-site checks so you only pay for what actually solves the problem.
Trade Summary
Replacing aged, mouldy silicone is fast, affordable preventative maintenance that protects your home from costly structural rot. Send photos of your bathroom silicone to Tile Seal Pro Regrout for a prompt quote.